
Please note that this tutorial was authored by Requiemart and was originally posted on her website, it is being archived here with her permission/blessing as a part of the Pullip Information Preservation Project.
Level: Beginner
For this project you will need-
– Razor Blade
– Small screwdriver, both phillips and flat head
All pullips have the same internal mechanisms, Taeyangs and Namu have the same inside, and Dals have the same inside EXCEPT the eyelids are not removable so you don’t have any blink levers/springs.
If your doll comes with a non-blinking eye, opening up the head and resetting the eye mechanism is often the only fix. Other than that, this is the most standard customization operation.
1. Turn your doll over and pull up the hair. In many cases the doll’s wig isn’t glued on strong enough that prying it up from the back with your fingers won’t take it right off nice and clean. Dolls that will definitely need to have the wigs cut off are earlier wigged dolls, like Serpant, Arietta, and Nero.

2. Start working the edge of the razor under the back of the hair. If the wig is on tightly you may get a couple of tears, so it’s best to start at the back where damage will not be visible if you reuse the wig. This takes patience, so alternate between small cuts and tugging up the wig between each cut to work your way around the back.
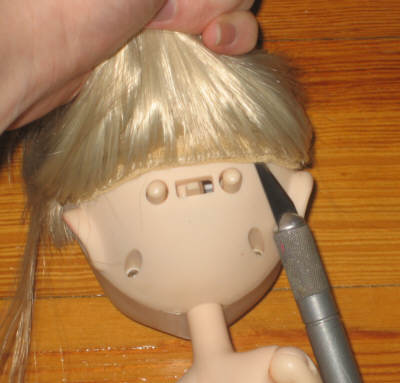
3. On most wigs, once you can get a firm grasp on the back of the wig (usually loosening the wig from ear to ear) a good tug will remove the entire piece. If it doesn’t, continue to do the small cut-tug-cut around the entire rim.
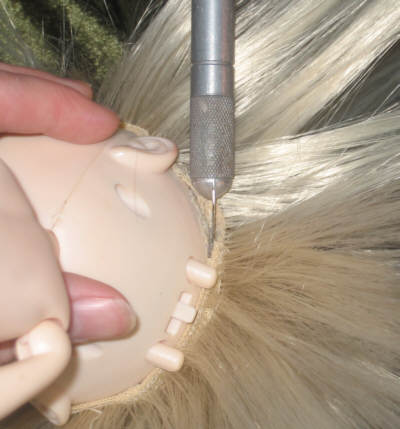 4. If you doll is rooted, then there is no wig. To remove the hair you have to remove the scalp. On the most recent dolls (all dolls with a type 4 body, andy type 3 dolls Evangelion or more recent) there is no scalp, so you can ignore this. Some Taeyangs don’t have scalps, and no dals have scalps and you can skip this step
With all other dolls, you need to remove the scalp if you want to get into the head. Again, starting at the back where any damage won’t show, insert the flat screwdriver in the crack. First at a downward angle until you can’t push any further, then push inward and up. If it doesn’t come off with one penetration, work around the back of the head, from ear to ear. Older dolls are glued more tightly than newer ones.
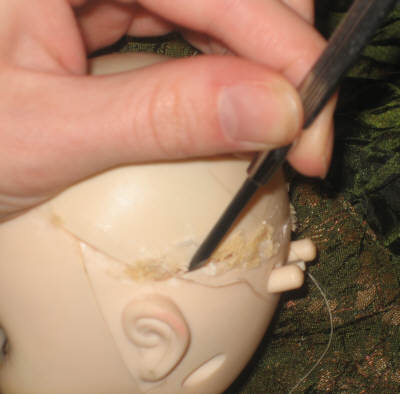
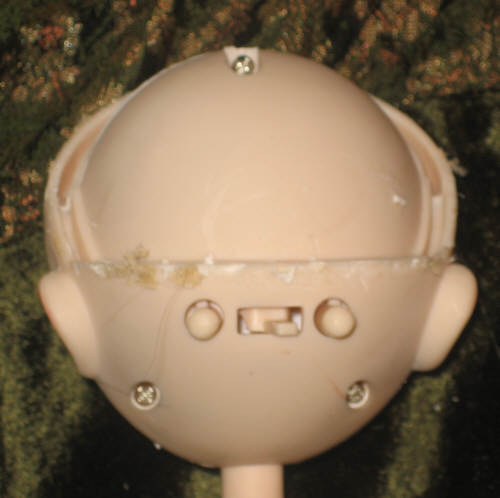
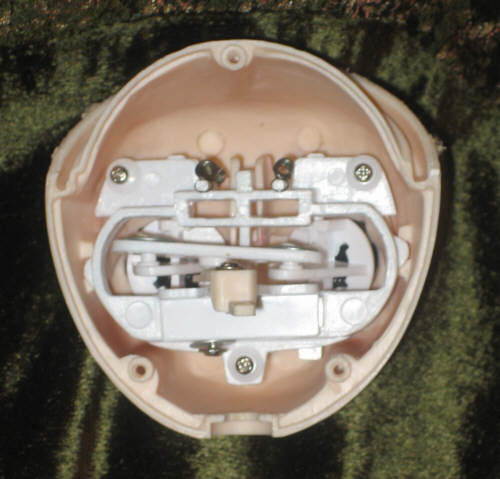
5. Now you can see all the screws holding the pullip’s face together. The top screw, revealed by removing the scalp, and the bottom two screws which were already visible. Remove them with your phillips head screwdriver. Be careful to use the right size, as too small a screwdriver will strip the screws. To remove a stripped screw you will need to use a drill bit to drill down into the screw severing the head from the shaft. It’s not easy, so take care to use the right screwdriver in the first place.
6. This is the inside of the head. It may seem complicated, but after opening it up 2 or 3 times it will seem very simple.

7. The flesh colored pieces coming out towards you are the blink mechanism levers. Remove those first.
 8. Now look for the two little springs attaching the eye lids to the eye mech between the eyes on the top. Gently pull them off the pegs and release.
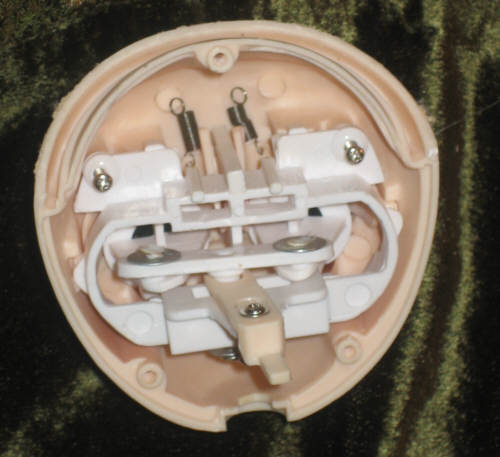
9.There are three screws holding the eye mech in. One at the corner of each eye, and one on the bottom. Remove them and take out the eye mech. Now all that’s left are the eye lids and the face plate. Take care to notice how the bumps on each side of the eye fit into the slot. This keeps them aligned so that they will open and shut when the lever is pressed. Usually if an eye does not blink it is because one of the sides isn’t in its slot.
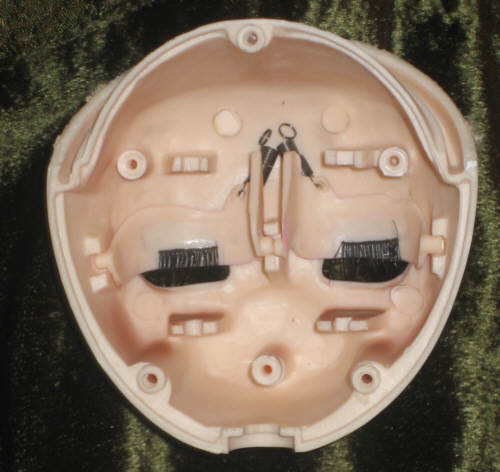
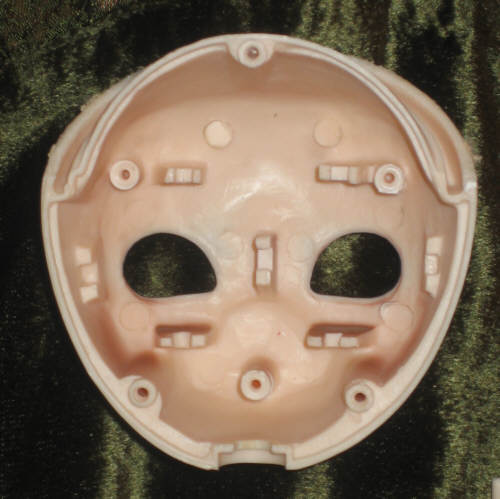
10. Remove the eye lids. Now all you have is a bare face plate.
To replace everything, go backwards from the removal. First carefully insert the eyes, leaving the springs pointing upward for easy access later on. Replace the eye mech, making sure that the posts going through the eyes fall into the slots on the top and bottom of each eye hole on the face plate. You can tell when it works by moving the eye mech side to side. If it moves smoothly and the mech does not shift around, it is probably in place. Replace the screws. Replace the levers. Put the neck in the hole and replace the back of the head and re-screw. Voila.