
Please note that this tutorial was authored by Requiemart and was originally posted on her website, it is being archived here with her permission/blessing as a part of the Pullip Information Preservation Project.
Type 2/Namu/Taeyang Ankle Repair
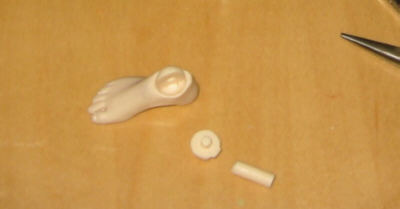
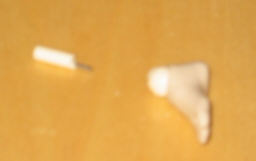
The ankle is the weakest point of the Namu/Taeyang body. Coupled with how most 1/6 scale boy shoes, as well as stock jun planning/Groove shoes are generally tight as hell, there is a very good chance you will have to do this repair at one time or another. Pullip type 2 ankles are structured the same way, though breakages are rarer.
This is an intermediate tutorial, as a drill and sharp implements are involved
For this project you will need:
- Drill
- Paperclips
- Wire Cutters
- Superglue
- Apoxie (optional but recommended)
- Needle Nose Pliers (if the shaft is stuck in the leg)
 1. Get the joint out. If it’s stuck in the leg, needle nose pliers should do it.

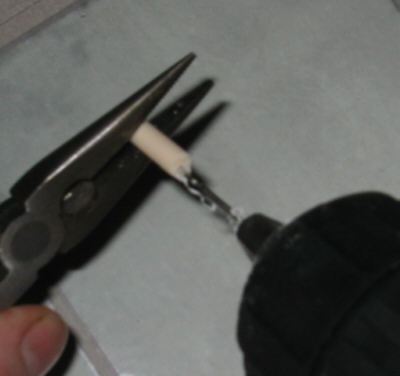
2. Select a drill bit that is slightly smaller than your paper clip. Drill up into the shaft where the break occurred–NOT in the middle.
3. Drill down into the ball joint in the foot where the shaft broke, but as far away from the center as possible. You don’t want to accidentally fuse the ankle joint together.
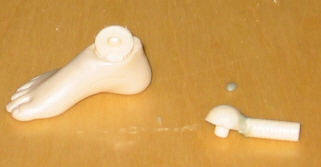
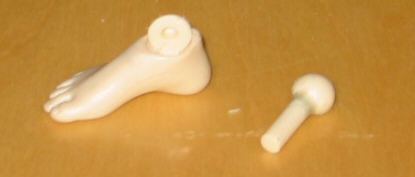
4. Seperate the broken ball joint from the foot if you haven’t already. Cut a length of paper clip and tap it into the hole you drilled in the shaft. If you need to trim it down before you put the ball joint on, go ahead.
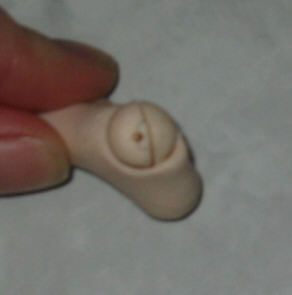
5. Use a thin coating of superglue on one of the sides of the break before you tap the steel length into the drilled part in the ball joint. The superglue isn’t necessary if you drilled properly and have a nice tight fit with the paperclip bit, but it is good to have the extra reinforcement just in case.
6. This step is optional, but recommended because namu ankle joints are very weak, even with this repair. Play rough and you’ll re-snap the ankle and just bend the steel core you just inserted. So for that extra bit of protection, use a tiny bit of apoxie around where the shaft meets the ball joint. Make sure not to get it anywhere that will interfere with the mechanism, but a few millimeters of extra coverage will go a long way. \
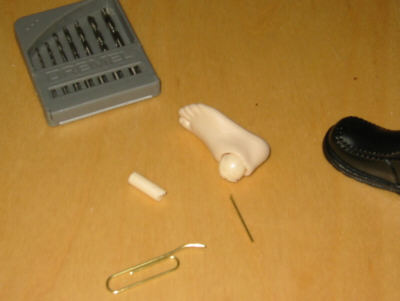
If you didn’t use apoxie sculpt, let the joint set for a couple of hours before you put it back in. If you did use apoxie, let the joint set for at least 6 hours before you put it back in. Now you have a nice new ankle that is marginally stronger than the old one. And stay away from those ken shoes. GI Joe boots are hotter anyway.
NOTE: If you can’t use a drill, or don’t have one, you can still do this repair by heating up the ends of the metal shaft with a lighter until they are very hot (hold it with pliers while you heat) and pushing the hot end into the shaft. After it cools, the plastic will be bonded to the metal. Turn it around and heat up the other end, and push that into the ball joint. It’s just slightly more risky since you might accidentally melt the joint out of shape.