
Please note that this tutorial was authored by Requiemart and was originally posted on her website, it is being archived here with her permission/blessing as a part of the Pullip Information Preservation Project.
This tutorial is beginner level–but the parts that almost always come after it are intermediate. You can’t un-sand, so make sure that you’re ready to take that step.
For this project you will need:
- Razor Blade
- Sand Paper, approximately 1000 grit (Automotive sections for car detailing. Check wal-mart.)
- Rubbing Alcohol (optional)
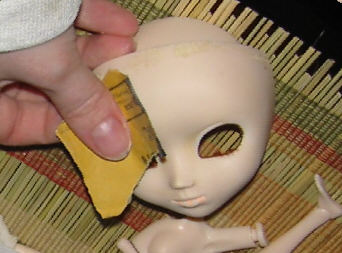
Whenever possible, I wet sand. I take the doll over to the sink and run the water and either douse both it and the sand paper (if I’m removing all the makeup) or I keep a small piece of sandpaper wet and use that if working on a particular area. Wet sanding yields smoother results, and leaves both your doll and your sandpaper cleaner (it also makes your sandpaper last longer). Wet sanding is not such a good idea if you are removing portions of makeup on a doll that has already been partially customized and hasn’t been sealed with waterproof sealant for obvious reasons.
Sanding: (If you’ve ever done fine sanding work you can skip this paragraph). Generally the best method from jewelery making to furniture construction is to start with a rougher sandpaper and work your way up to fine. I start with 800 grit sandpaper or something thereabouts, and use even pressured circular motions over the area that I want to sand. If you are working on eyebrows and do not want to disturb eyeshadow, or vice versa, you may want to use a finer sandpaper and use lighter smaller strokes to have better control. If there are any areas that have light scratches from the sandpaper, you can smooth them out with the 1000 grade sandpaper.
Onto the face: If you are removing all the makeup, you might want to open up the head and remove the eyes first. Why? Because you won’t damage the eyes accidentally this way, and you won’t accidentally break the neck.
Start anywhere. Just make sure to do a thorough job, even sanding areas that do not need to be sanded for an even finish.
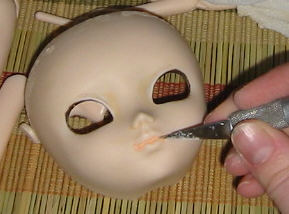
In nooks and crannies, you can carefully scrape away paint residue with a razor blade. You can also fold the sand paper in half, rough side out, and get into cracks and crevices that way.
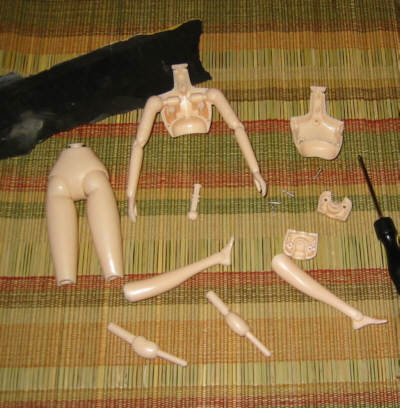
That should take care of it! Sanding is the easiest part. Type 1 and 3 bodies can do with sanding to help them match the face, and early type 2 bodies (Arietta, Venus) can have their arms and legs matted to make them match the soft torso better.